Uploading Microsoft Office Templates to SharePoint
Introduction
We have a current client that deal directly with blind and partially sighted people. They have a customised Word Template where the default normal font must be Arial size 14 with Headings etc additionally edited for their needs as well. (We also know many other client that use lovely nice corporate (paid-for) branding and fonts)
The Requirement
No matter where they start authoring a document it should use the correct fonts and branding. If you really think about that, where can you actually start a document? There are many places:
- Desktop Word
- Word Online via SharePoint
- Word Online via OneDrive for Business
- Word Online via Office 365 Groups starting at Outlook, directed to SP Sites
- Word Online via Office 365 Groups starting at OWA
- Within Teams interface
- Within Teams in SharePoint
Now, only in SharePoint explicitly can you upload a content type Word Template (and other Microsoft Office workloads) and have it appear on the “New” option in the SharePoint ribbon for everyone.
For Desktop Word that is achieved as normal, set the .dotx on the machine
In OneDrive for Business it has to be done on an individual user basis (and that process is NOT for the faint hearted – and definitely not something you can ask a user to do! PLUS even then it only works for “New” when you are in Classic mode!!!
My understating is that for Office 365 Groups, the Group Owner/Admin can do it, but I have not been able to make it work so far
For Teams, apparently, it cannot be done at all (so I didn’t try – but I had lost the will to live with this by then)
The whole Office 365 suite of document solutions really needs to have the ability to have a consistent look and feel but delivered by administrators in a simple way.
Here is what I got back from Microsoft in December 2017:
“The scenario is well understood, and in my experience isn’t unique to the needs of [your customer] – we hear this pretty consistently from customers.
The good news is there’s work happening to help enterprises use custom branding resources; my hope is that this leaves us with something you’d be able to use, or puts us on a path to deliver that soon after.”
Below I am trying to demonstrate succinctly and articulately clear instructions how to deploy and use Corporate Branded Office Templates in SharePoint Online. It is not as easy as you might think and right now Microsoft has not made a good job of making a consistent look and feel for creating new documents easy. Remember in the days before Office 365 in Microsoft Word you simply updated and saved normal.dot and then pushed it out to everyone. Voila, consistent documents with the correct fonts and colours. In Office 365… not so easy.
So what can you do, and how can you do it for now? If you have stumbled upon this blog, then I feel your pain – but read on, the Intended Audience of this blog is really for Office 365 Administrators – specifically the SharePoint Administrators and of course Corporate Branding Staff.
SharePoint Configuration
Connect to Office 365 SharePoint as an Office 365 Global Administrator that has had a SharePoint license allocated.

Create a content type for a document template.
Head to: https://yourdomain.sharepoint.com/SitePages/Home.aspx
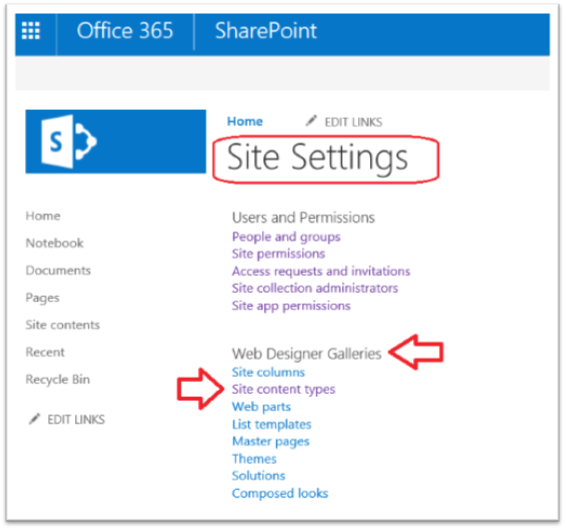
Site Settings
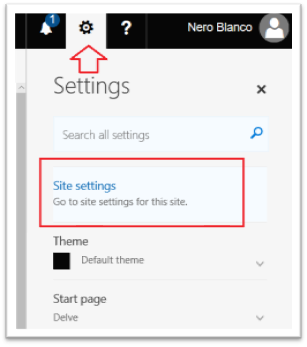
Go to the Gear Icon, top right on the ribbon, select Site Settings from the Site Actions menu.

Site Content Types
Under the Web Design Galleries section of the Site Settings page, click Site content types.
Click Create:
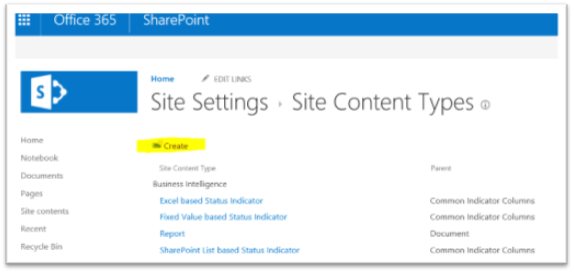
New Site Content Type
On the New Site Content Type page, do the following:
- In the Name field type “CLIENT Excel Template”
- In the Description field type “Create new Excel Workbooks in this library”
- At Select parent content type from choose “Document Content Types” from drop down list
- At the Parent Content Type drop-down list select “Document”
- For Group, choose an Existing Group “CLIENT Templates” for the “Put this site content type into”
- Click OK.

Advanced Settings
On the Site Content Types > CLIENT Excel Template page, under Settings, click Advanced Settings.
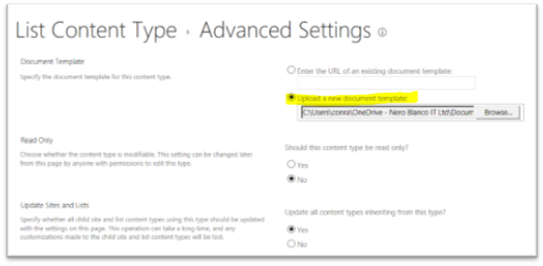
In the Document Template section, select the radio button for Upload a new document template, click Browse, and then choose your pre-created Template

Click OK
Note: You can also add a new Word, PowerPoint, or OneNote template by repeating the above steps for each file type. You can also create multiple and different templates of the same file type.
Display the new template as a choice when creating new documents
Now that we have created content types for Word and Excel templates, we need to add the content types to a Document Library. This step ensures that they will appear as choices from the New Document command on the ribbon.
Library Settings
Navigate to the library to which you want to associate the new content types.
Again, select the Gear Icon on the ribbon but this time choose Library Settings.

Documents Advanced Settings
Under General Settings, click Advanced Settings.
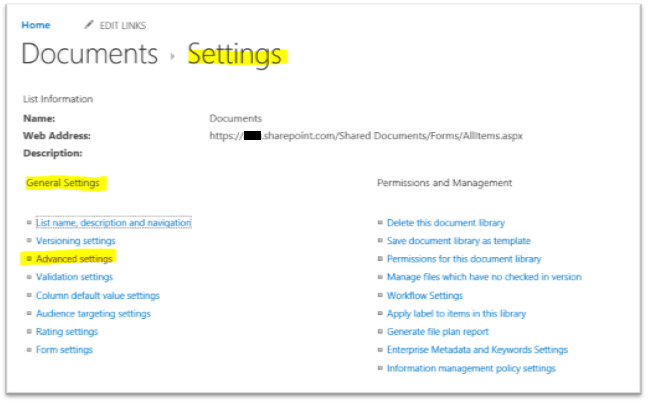
Allow management of content types
In the Content Types section, click Yes under Allow management of content types, and then click OK.

Add Existing Content Types
On the Library Settings page, under Content Types, click Add from existing site content types.

On the Add Content Types page, choose CLIENT Templates from the Select site content types from drop down list

Under Available Site Content Types, look for and select the new content types to associate to this library. In our case “CLIENT Excel Template” and click Add.
Click OK
OneDrive for Business
OneDrive for Business can also host a default template, however this cannot be achieved centrally, so it needs to be configured by the end user, or by an administrator logged on as the end user.
The process is very similar to above. ODfB is just a “Site” in SharePoint so the terminology is identical.
Log in to Office 365 as a user and use the Tiles to go to OneDrive.

From here, choose the Gear Icon and select Site Settings
Again, go to: Site Content Types
 Create new Site Content Type, Choose Create
 Complete all the fields for New Site Content Type
Name, Description, Parent Content Type, and save to a Content Type Group and then click OK. (careful the OK button hides behind a pop out panel from the right)

Now go back to the Site Settings from the Gear Icon per above and choose Site Content Types again, scroll down and find your Content Type. Click on it and then choose Advanced Settings.

Complete the following fields. Click the Upload a new document radio button and then browse to the Word Template you wish to use. Then click OK.
Now go back to the Site Settings from the Gear Icon per above and this time choose – “Site libraries and lists”

Choose Customize “Documents”

Go to Advanced Settings

Allow management of content types should be selected to yes and saved if it is not already set.

Click OK to come back to the Advanced Document Settings and scroll down to about the middle of this page and find: Content Types and then select Add from existing site content types

Find the content you created earlier from the Template Group you created, add to the right hand side, and click OK.

Change the New Button Order
After clicking OK from above you will be back to the Advanced Document Settings and scroll down to about the middle of this page and find: Content Types and then select Change new button and default content type

Change the Position from top and optionally choose to hide the Default OneDrive Microsoft Document option. Click OK

Using your new Document Choice in OneDrive for Business
It should be seen here:
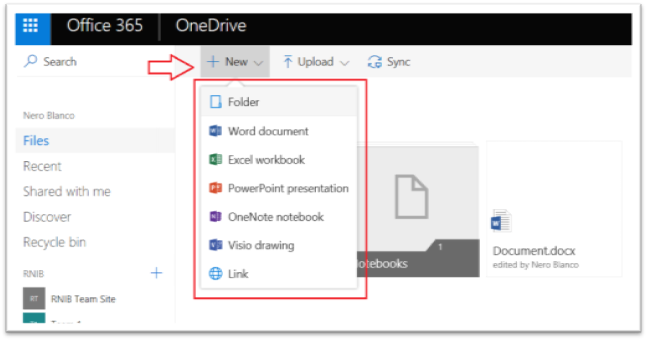
But right now, there is a bug and a ticket is open with Microsoft about this. As at 12 September 2017 this is confirmed (via MS Support Ticket) but with a resolution only TBC. The workaround is to switch to OneDrive Classic by going to the bottom left hand corner and clicking “Return to classic OneDrive”.

Now you will see what “New” should look like.
New Documents in OneDrive for Business Classic

For Teams and Office 365, you pretty much have to try the same thing from within the Browser and see how you go!